
Right Fax Profile Settings and Fax-Mailbox Options
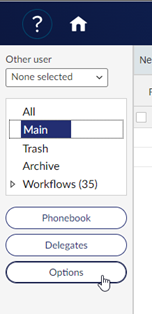
The options page can be accessed via the options button on the main inbox page.
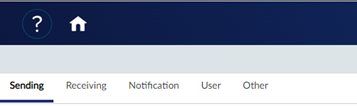
Sending
- Hold for preview. Faxes you send will be held so that you can preview them before you choose to send them.
- Use smart resume. If a fax fails during transmission, then the fax server will resend only the portion of the fax that failed to send.
- Cover sheet. If available, you can select a cover sheet file.
- Prepopulate destination information on forward. If you forward a fax that you previously sent, the destination information will be copied to the fax you are forwarding. You can change the information as needed.
- Create PDF image for email. If you send a fax to an email address, a PDF will be sent instead of a TIFF file. These PDF images are black and white and cannot be edited.
- In the Automatically delete list, select if and when to automatically delete faxes:
- Never
- Only if Successfully Sent
- All Faxes (successful and unsuccessful).
- In the Priority list, select the default priority for sending the fax: Normal, Low, or High. The high priority option is only available if your user profile includes the appropriate permission.
- In the Conversion bias list, you can select one of the following options:
- Use Server Default. Use the conversion bias that is set on the fax server.
- None (do not optimize).
- Optimize for Images. Optimize for graphical fidelity.
- Optimize for Text. Optimize for legibility of text.
- High Contrast. Optimize for both images and text.
Receiving
- To automatically forward to a user:
- Click Forward received faxes to users.
- Search for a user or group. in the Select box, enter a full or partial user ID, and then select one or more users in the list.
- To automatically forward to a group of users:
- To forward to a group of users, click Forward received faxes to group.
- Search for a user or group. in the Select box, enter a full or partial group ID, and then select one or more users in the list.
- To automatically forward to a fax number:
- To forward to a fax number, click Forward received faxes to fax number.
- In the text box, type the fax number.
- To not forward received faxes:
- Click Do not forward received faxes.
- To automatically print received faxes:
- Under Automatic Printing, select the Automatically print received faxes check box.
- Click Set Print Options.
- In the Print dialog box, select the printer and any additional print settings.
- To automatically convert received faxes to text:
- Under Automatic OCR, select the Automatically OCR received faxes check box.
- Click Set OCR Options.
- In the Output Type, Layout, and Format lists, select a file type, layout, and format for the output files.
- Under Page range, specify the range of pages to convert to text.
Notification
- To set preferences for sent faxes:
- Under Sent Fax Notifications, select the check boxes next to the sending events about which you want to be notified.
- In the During transmission list, select if or when you want to receive notifications about sent faxes in transmission: Never, Once Only, or Periodically.
- In the Incomplete faxes list, select if or when you want to receive notifications about incomplete faxes: Never, Once Only, or Periodically
- To set preferences for received faxes:
- Under Received Fax Notifications, in the Received Faxes list, select if or when you want to receive notifications about received faxes: Never, Once Only - When initially received, or Periodically - While fax has not been viewed or printed.
- To send notifications of your received faxes to another user:
- Under Alternate User Notifications, select the Notify an alternate user check box.
- Under User to notify, enter a full or partial user name or RightFax user ID, and select the user.
 indicates if a user account is disabled,
  if it is unprotected.
User
- To control Smart Fax Distribution:
- If you don't wish to receive distributed faxes, select Refuse distributions. This option is available if you have the appropriate user permission.
- To add a profile picture:
- Using a graphics program, create a .gif, .jpeg, .jpg, or .png image. The maximum file size is 1 MB.
- Under Profile Picture, click Change.
- In the Edit Profile Picture dialog box, select the image file, and then click Open.
- In the Select image area dialog box, select the area of the image that will be used for the profile picture.
- Click Ok. To change the image after it is saved, you must upload a new image.
- To add a personal stamp file:
- Using a graphics program, create a .gif, .tiff, .jpg, .png, or .bmp image. The maximum file size is 1 MB.
- Click Edit Personal Stamp. The Edit Personal Stamp dialog box opens.
- In the Description box, enter or change the description of the stamp.
- Click Import, and the Import Stamp File dialog box opens.
- Browse to locate the image file. Select the file, and then click Open.
- In the Edit Personal Stamp dialog box , click Ok.
- To change your cover sheet information:
- Under From, as needed, enter the contact information that you wish to appear on your fax cover sheets. When you send a fax later, you can edit this information on the cover sheet.
Other
- To set miscellaneous program options:
- Under Application Options, select the check boxes for the options you want to activate:
- Send deleted faxes to Trash folder. Use the Trash folder as a temporary storage for deleted faxes. This means that you can restore a file after deleting it by moving it from Trash to another folder.
- Empty Trash folder on exit. When you exit the application, files in the Trash folder will be permanently deleted.
- Use RightFax phonebook. When you create a fax, the entries in the RightFax phonebook will be available. You can then select a destination from the phonebook for a fax you are sending.
- Allow delegate duplicates in user list. A user for whom you are a delegate will appear multiple times in lists of users if the user is also a member of a group or groups for which you are a delegate.
- To set the cheap rates time: (This option is not relevant to NSU Faxing)
- It may cost less to send faxes during certain hours of the day. This is known as the cheap rates time.
- Under Application Options, in the Cheap time display, specify the time.
- To set default options for printing:
- Click Set Print Options.
- In the Print dialog box, in the Printer list select the printer to use as the default.
- Define any additional print settings, and then click Ok.
- To set default options for optical character recognition:
- Click Set OCR Options.
- In the OCR dialog box, select the file type, layout, and format of the output files.
- To OCR all of the pages in your faxes, select All pages. To specify the range of pages, select Page range, and enter the range of pages in the From and To boxes.
- Click Ok.
- To make additional phonebooks available:
- Under Additional User Phonebooks, for each phonebook you want to add, in the Select box, enter a full or partial user ID, and then select one or more users in the list.
- In the Password box, type the password.
- Under Application Options, select the check boxes for the options you want to activate: